William Wallace Maps
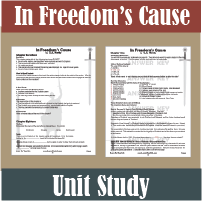
Four different maps of William Wallace identify important locations. The In Freedom's Cause maps and William Wallace battle worksheets provide detailed information of the movements of Wallace and Bruce.
In Freedom's Cause Maps
Our unit study on the lives of William Wallace and Robert Bruce is based on G.A. Henty's book, In Freedom's Cause."Four different maps are provided in the unit study to help students identify the locations.
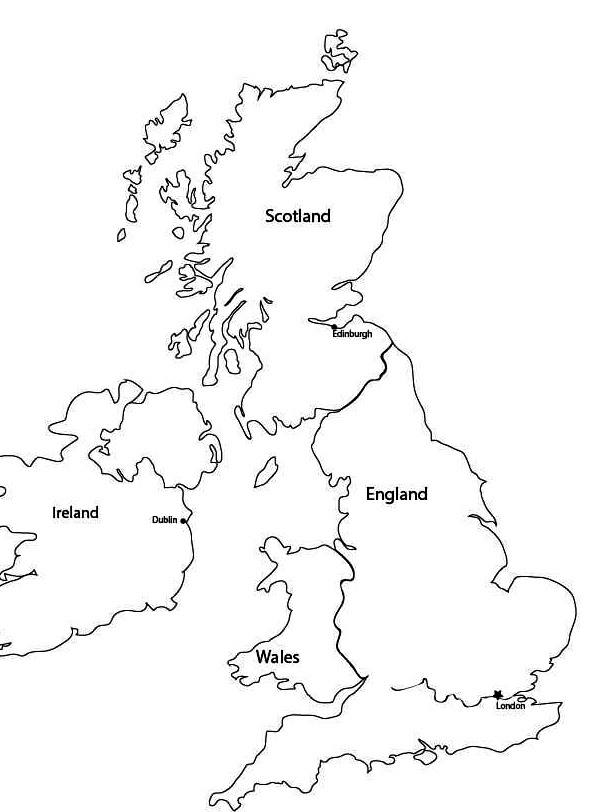
Map of Great Britain
It might seem obvious to some, but if students don't have a solid understanding of the location of England, Scotland and Wales to each other, much of the history will not be as clear.
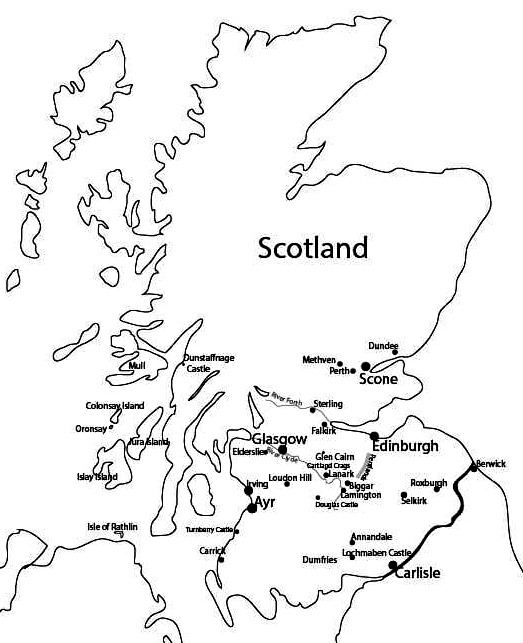
Map of Scotland
Students are provided a grayscale map of Scotland on a 8.5 x 11 page. They are able to identify the towns and battles of William Wallace and Robert Bruce as they are encountered in the book.
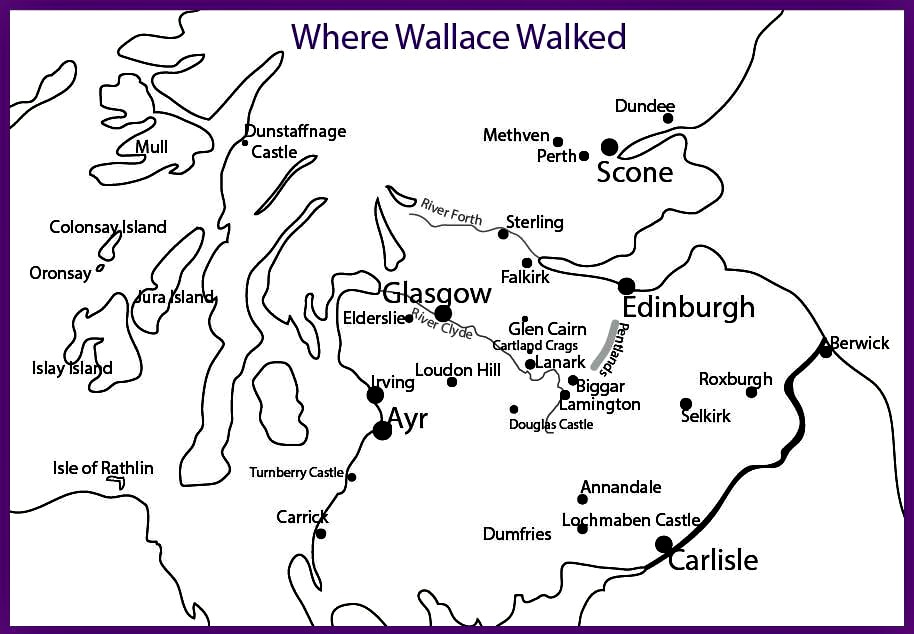
Map of Where Wallace Walked
Here we have a closer view of the same map above.

Map of The Battle of Stirling Bridge
Our In Freedom's Cause Unit Study includes worksheets of two of the most important battles: Stirling Bridge and Falkirk. The maps are provided in color and in grayscale.
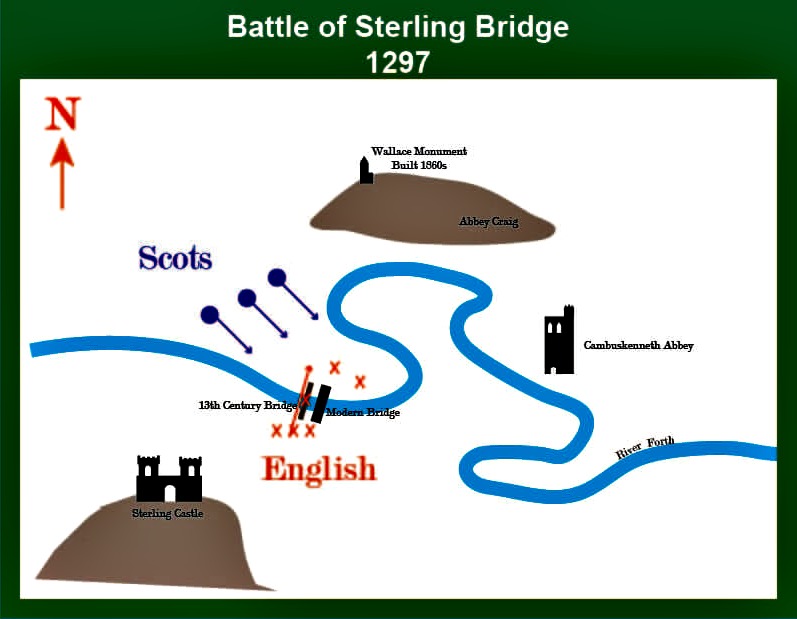

- The two armies were separated by the River Forth. The British were on the southern side where Stirling Castle was located. In the morning they marched their troops across the narrow bridge, including their archers.
- Under Wallace command, the Scotts waited patiently until the bulk of the army had crossed the bridge, then Scottish infantry attacked. The archers were unable to fire due to the proximity of their enemy. The calvary were on the other side of the bridge and unable to advance.
- The British infantry tried to retreat across the bridge but were stopped by the oncoming troops ordered to advance to battle front. Many jumped or were pushed off the bridge and drowned in the river.
- The commanders watching the battle from the heights of both sides witnessed a massive British defeat.
Map of The Battle of Falkirk
The Battle of Falkirk is a little more complicated to follow, but the defeat of the Scottish had long term implications for Wallace and his forces (and the troops that betrayed him.)
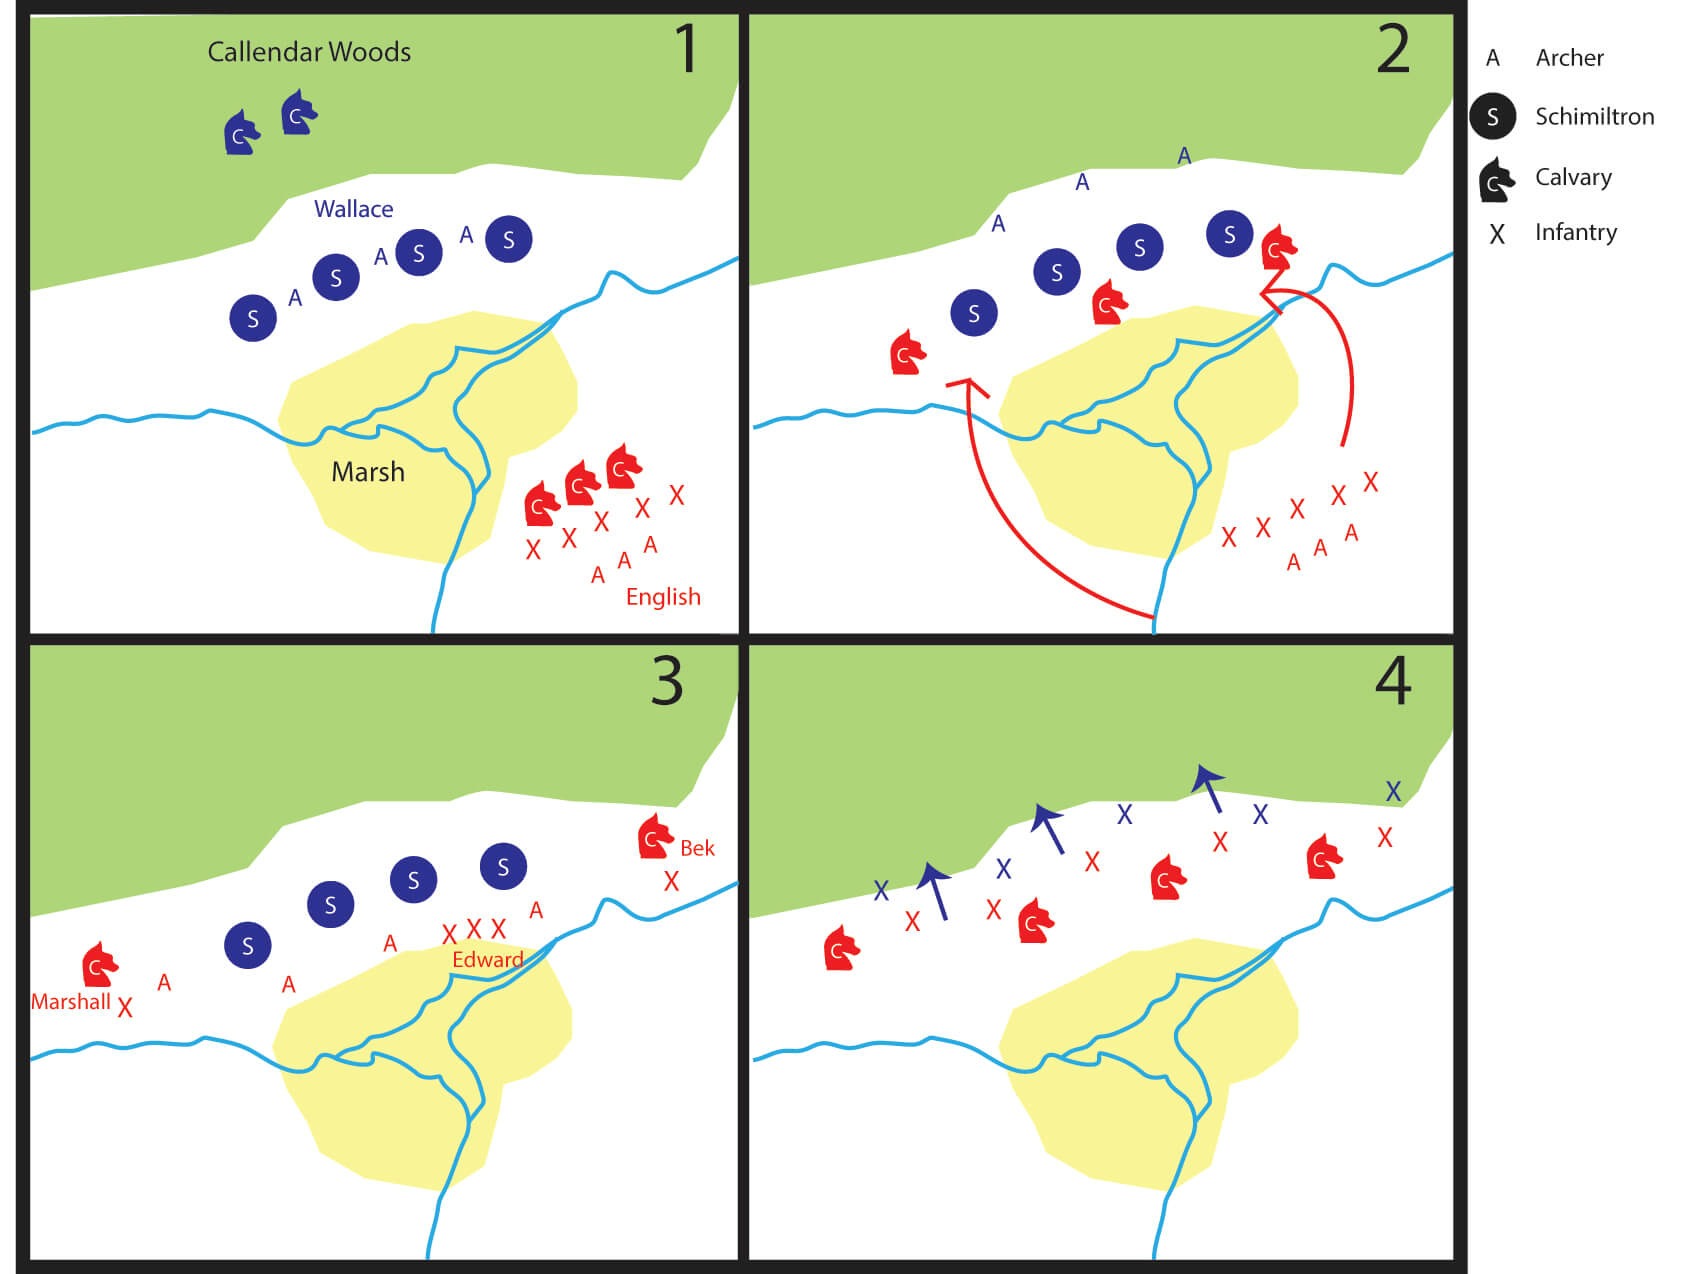

- As before, Wallace tried to maximize his strength by using geological features including the woods behind and marsh in front. The majority of Wallace’s army were pikesmen positioned in schimiltrons. Archers were stationed between the schimiltrons. The Scottish calvary made up of nobles were behind the lines in Callendar Woods.
- As the battle began, the English moved around the marsh and attacked the Scotts on their flank. The schimiltrons held, but the archers fell back. In a move largely considered traitorous, the calvary departed and left Wallace and his men stranded.
- With the schimiltron’s holding strong and causing disorder and inefficiency in the English calvary, King Edward of England called the calvary back and reorganized. He brought his archers forward. Armed with the deadly new long-bow, the archers destroyed the schimiltrons.
- The longbows destroyed the schimiltrons which broke up and fled with the British in pursuit.
What Else Is On the Unit Study?
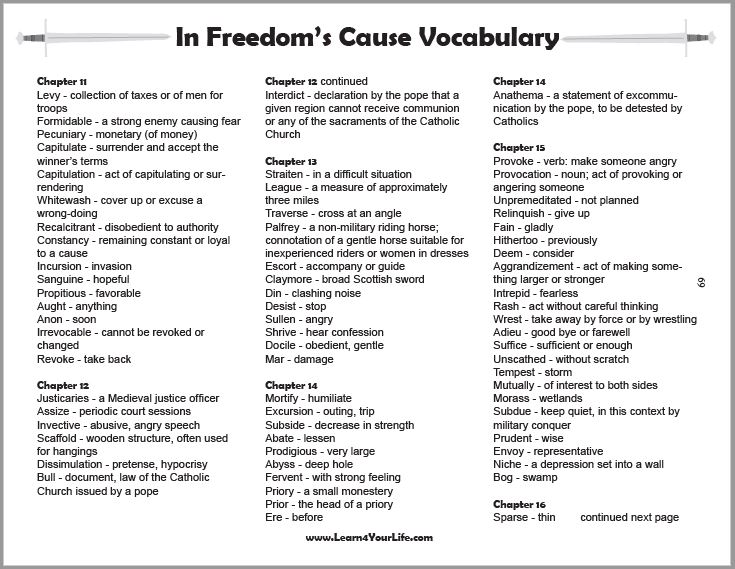
Vocabulary
More Activites
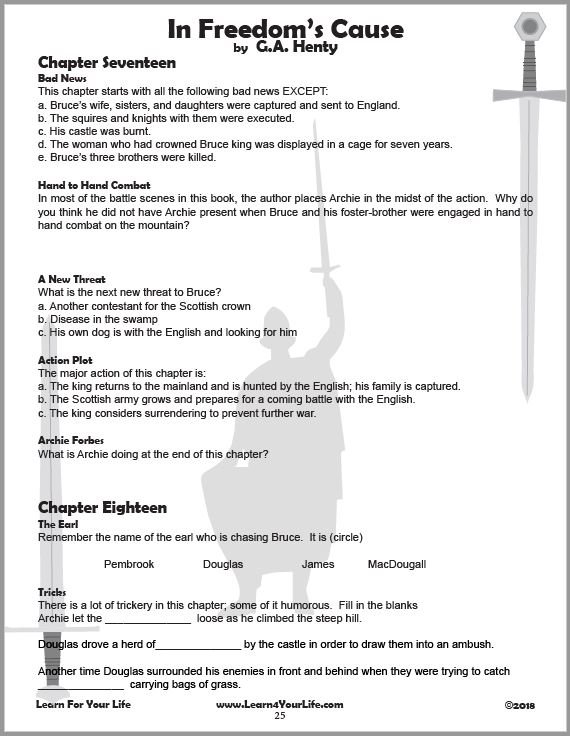
Our unit includes:- Reading comprehension activities
- Multi-media presentation suggestions
- Hands-on activities
- Background information
- And More!
Buy In Freedom's Cause Unit Study
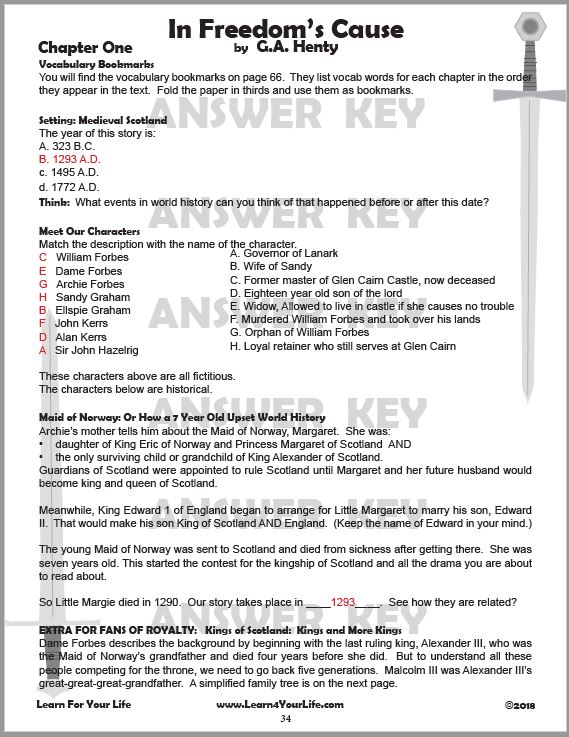
Student Guide AND Teacher's Answer Key Included
$2.99 Download - 82 pages
![]()
In Freedom's Cause Pages
A mini-directory for Wallace and Bruce
In Freedom's Cause Unit Study
Our 82 Page Unit Study
Chapter by Chapter Activities
Chapter by Chapter Activities
Vocabulary

Vocabulary Words and Definitions
Maps
Maps for William Wallace's campaigns
Timeline
Timeline of Wallace and Bruce
Wallace vs Robin Hood
Student activity comparing the two heros.
More Resources

More fiction and non-fiction books about Wallace