Earthquake Worksheets
Three Types of Waves in An Earthquake
These earthquake worksheets are from MatchCard Science Geology Unit Study for
Grades 3 - 8.
Free Download Below

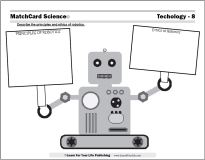
MatchCard Earthquake Worksheets
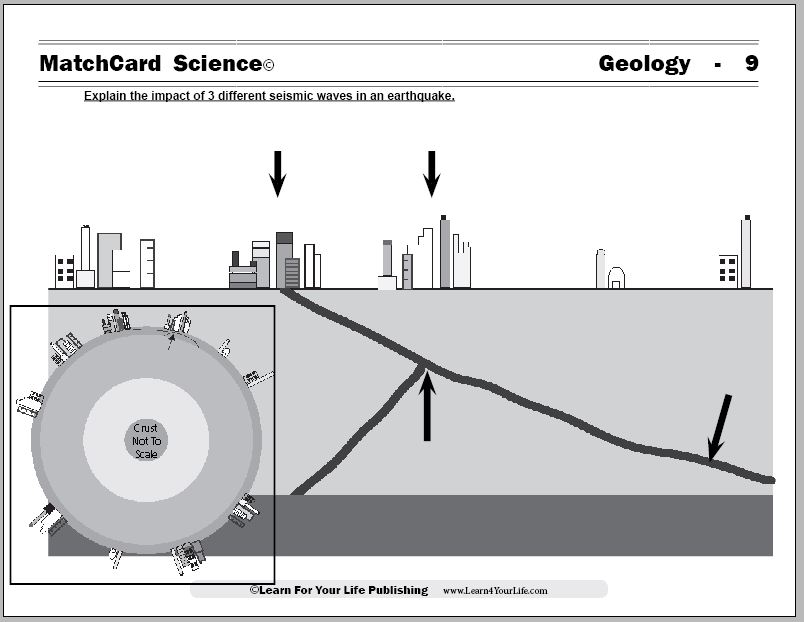
Objective: Explain the impact of three different waves in an earthquake.MatchCard: Free Download below.
MatchCard Information Pieces identify information about the primary, secondary and surface waves. Ideas for hands-on projects correlated to the information on the earthquake worksheets are listed on the instructor's page and below.
Print the Earthquake MatchCard

Simulate 3 Types of Earthquake Waves
Let's make some waves to learn how the three types of seismic waves work.P Waves
The primary waves are compression waves. They are also called P waves.P waves can be demonstrated with a toy Slinky, or any spring.
With a Slinky, have two people put the spring on the floor and pull the ends several feet apart. There should be tension in the wire.
If you are using a smaller spring, you will still pull the ends apart, though not as far.
Now, with a quick motion, one person should jerk the end of the spring further away from the opposite end. You can watch the wave travel through the spring.
Notice that the direction the wave hits is the same as the direction the wave is traveling.
S Waves
The secondary waves are the second waves to hit. They are also called S waves.S waves can also be demonstrated with the Slinky or with a jump rope.
Pull the rope or Slinky tight on the floor between two people. When it is taut, one person gives a quick side to side jerk.
Watch the wave travel down the length of the spring or rope.
Notice that the force of the wave is perpendicular to the direction it is traveling.
Surface Waves
Surface waves are similar to ripples in water. They can be demonstrated in a bathtub or large sink filled with water.Put a plastic floating toy in the water. Let it rest until there are no waves and the toy is still
Then, quickly press down on the water with your first with a quick jerk to cause a series of waves. While the waves are moving the water, notice the motion of the plastic toy.
When something is floating in water, it does not move in the direction of the wave. It actually makes a circular motion up, then down, and back. Try it several times to watch the circular motion.
Surface waves are in the earth's crust, right under the surface. They have the same peak and trough as waves in water. Buildings and rocks make a similar circular motion as the floating toy.
Simulate an Earthquake on a Toy Town
Build Your City
You will need:- An empty box (a cake mix box, a shoe box lid, or even a thin cookie sheet will work)
- A piece of paper
- Some non-locking blocks
- A table top
- A thin ruler or thin piece of cardboard
Build five or six "buildings," on the surface, each made of three different blocks. Encourage variety in shape and size. Make a mental note or paper diagram of the structures built so they can be re-constructed.
Primary Waves Hit
To stimulate the first waves hitting a city, use your finger and quickly tap the book or cookie sheet from below. This will demonstrate the up and down motion of land, rocks, and buildings when the p waves hit.Notice how many blocks moved or buildings fell down. Put them back to their original position.
Here come the secondary waves
Now let's see the side to side action of the secondary waves. Quickly tap the side of the box to simulate the side to side movement.Again, count how many of your buildings were damaged, and have the construction crews fix them.
Surface waves
Slide the ruler between the box top and the piece of paper to stimulate the motion of the Earth's surface.Any conclusions on which waves are the most destructive?
Discussion
Imagine the three types of waves hitting a tall building. Primary waves move the building up and down. Secondary waves sway side to side. Finally the earth beneath the building moves as a ripple of waves pass beneath. Explain the damage.Using the Earthquake Worksheets
Use the first two pages of the earthquake worksheets (download below) to help students diagram and understand the waves.The diagram shows two fault lines where the focus of the earthquake occurred.
The p waves are the compression waves, illustrated with short lines. They start where the rupture along the fault lines occurred in the earth's mantle. The p waves travel in all directions.
Students can use different colored crayons or pencils to draw the different waves. The first of the earthquake worksheets is specifically for drawing the three types of waves.
The s waves are illustrated as a side to side "s" shaped wave. Because the s waves do not penetrate liquid, they cannot penetrate the outer core of the layers of the earth which is a burning hot liquid. Students can use a different color and draw their own s waves radiating from the earthquake's focus.
Finally, have them diagram the surface waves under the earth's surface with a third color.
In 3 Dimensions
Since the earthquakes worksheets are only two dimensional, it helps to use a globe or ball to demonstrate the three dimensional aspect of earthquakes and their accompanying waves.You can also use the Layers of the Earth MatchCard to illustrate these concepts.
The P waves and S waves travel in all directions. S waves are stopped by outer core of the earth. The P waves continue through to the other side of the globe.
Scientists use the measurements from around the world to determine the focus of a particular earthquake. They compare p waves, s waves, and surface waves to determine the epicenter.
In smaller earthquakes, the epicenter may be the location that is hit the hardest. In larger earthquakes, howevever, the damage done along the fault lines causes the greatest damage to the cities along the fault line. It may be hundreds of miles from the epicenter.
Digging Deeper
Earthquakes are fascinating subjects. There are more projects that students can do:- Make a map of the earth showing the most common locations of earthquakes
- Study a significant earthquake in history
- Make a poster showing the Richter scale
- Watch a documentary on earthquakes
MatchCard Science
How To Use MatchCards
Download the FREE MatchCard Science Instructor's Guide and see how MatchCards can make building their science knowledge base fun.
Geology Unit Study

12 Science Unit Studies
Chemistry is only one of twelve complete unit studies for kids in 3rd to 8th grade.
Comprehensive objectives, hands-on projects, suggested science fair experiments, and the fun game-like MatchCards keep them interested in learning science. See all twelve MatchCard Science Unit Studies.
Ready To Use Resources


About Our Site
Hands-On Learning